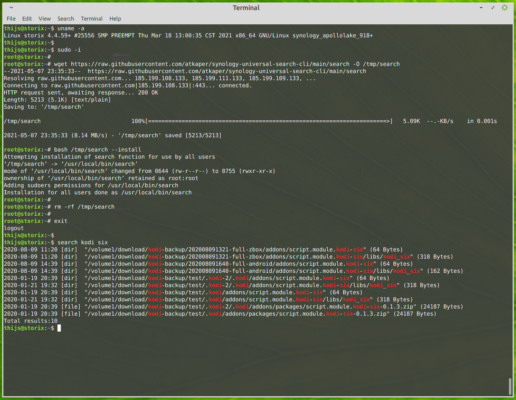
Synology Universal Search CLI
The web-gui on a synology NAS has an application called “Universal Search”. I wanted to be able to use this from the shell command line on the NAS also to find my files, so I set out to find if that would be possible.
TL;DR; See https://github.com/atkaper/synology-universal-search-cli for the end result. Or scroll down almost half way, till you find first mention of “synowebapi”.
To use Universal Search, you first have to set it up using the web-gui, to index some folders of interest (note: all images, click to zoom):
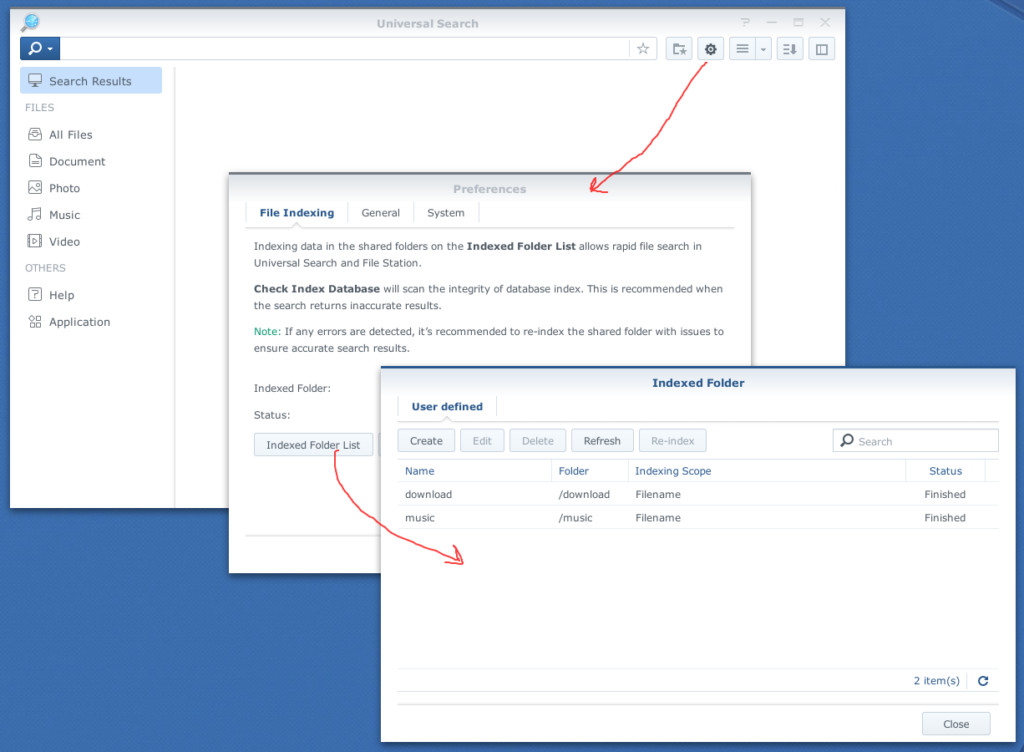
After I did that, I tried using the web-gui, and see how that worked. From the request/response, my guess is that is is running an elastic-search indexing. A “ps -ef | grep elastic” on the NAS shell, also showed an elastic process. I dug around a bit, and did find that it is using /var/run/synoelasticd.sock;

Now lets see if there are any candidate programs to use search:
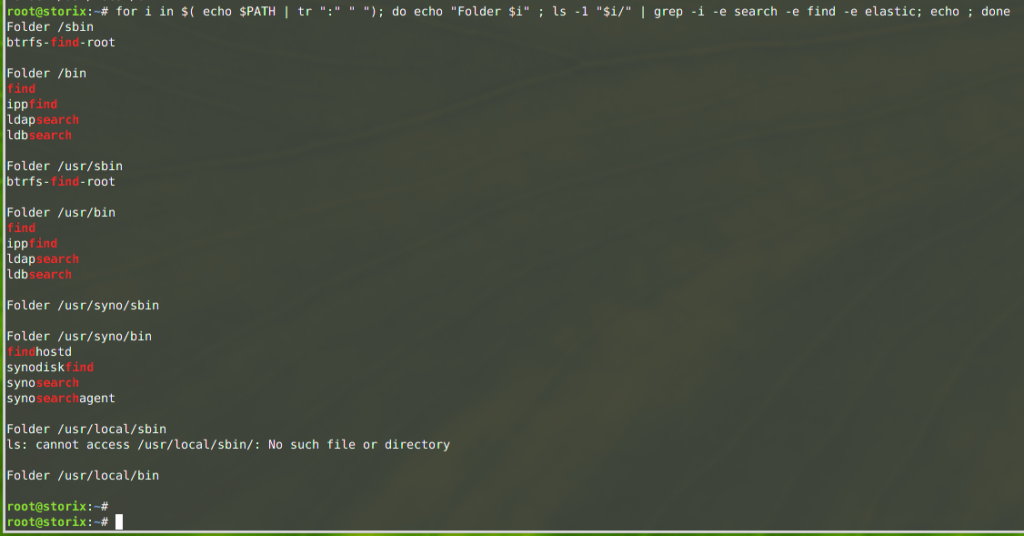
From this list, only synosearch looked hopeful, but I did not get file search from it. It mentions a “-t” option, which looks like an index name, but also trying different names there did not get me my file search…
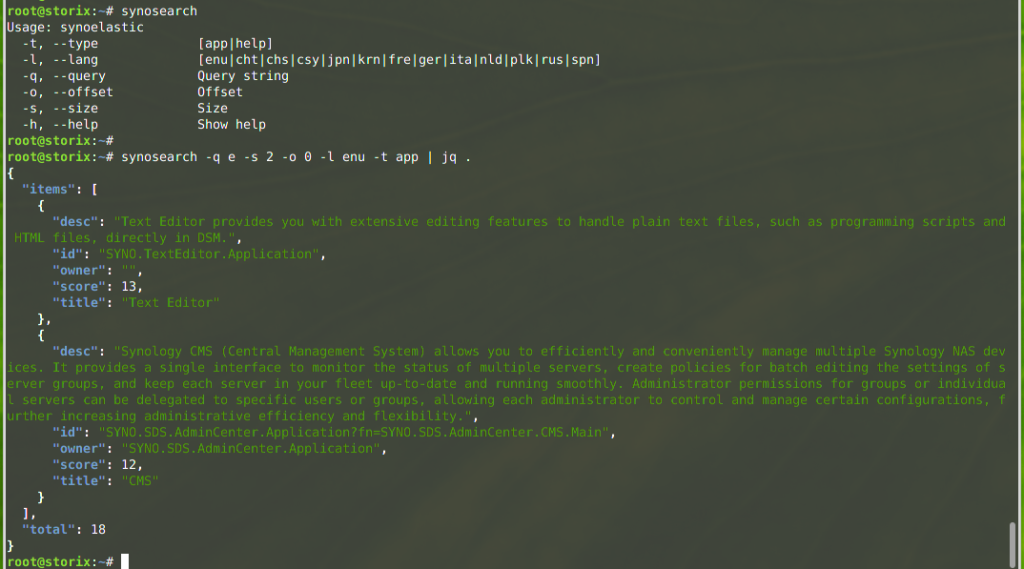
The elastic does seem to have app and file indexes;

Socket attempt, try using the socket file to execute a random query;

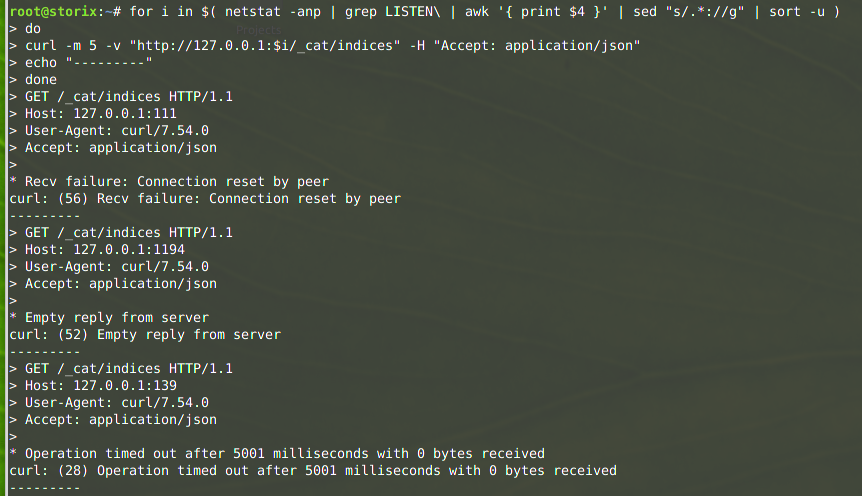
And checking ALL open TCP ports on the machine, to see if any of them send something logical back (some gave interesting responses, but none hinting at elastic):

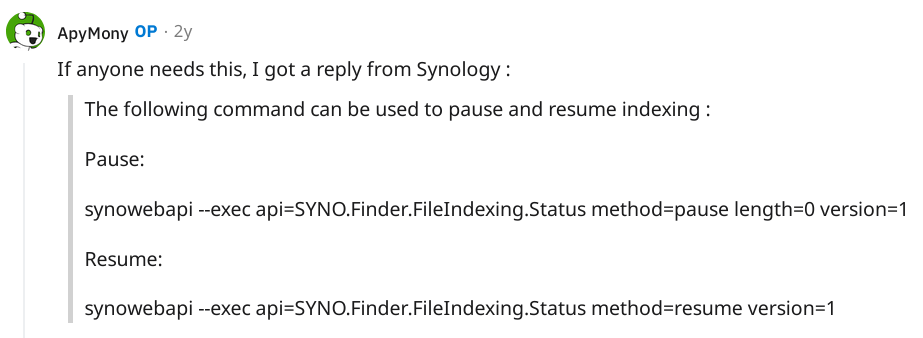
Next option, search the internet… not much luck. I did not find anyone who also tried getting this to work. But… I did stumble on an article about pausing search indexing, which put me on an alternative track! They mentioned a tool called “synowebapi“, from which I did recognize attributes I also did see in my web-gui, when looking at the network tab! Nice…
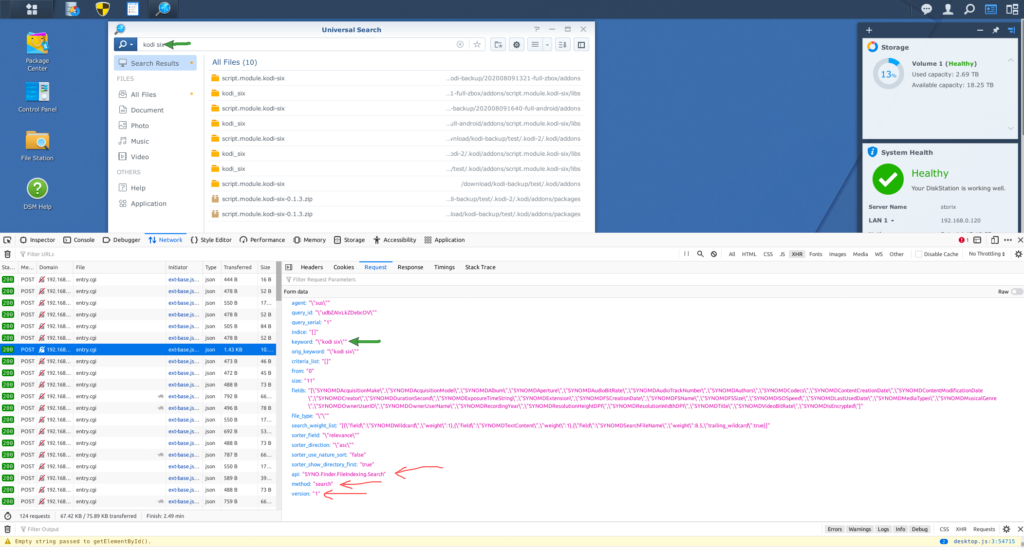

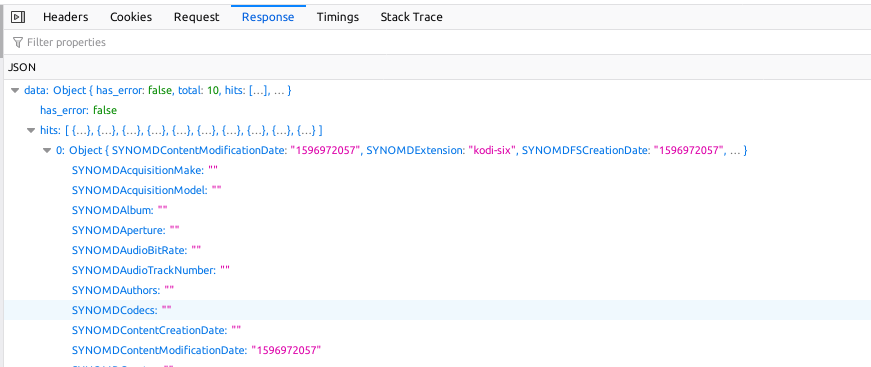
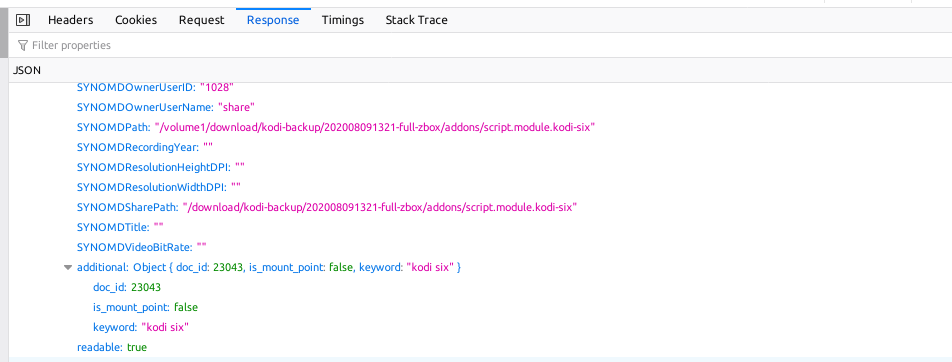
And here is a test run of an actual search, and what it returns. I did remove a bunch of the “fields” field names, to return less data. Many of them were blank, or not interesting:
(The code fragment 2> >(GREP_COLORS=’ms=01;31′ grep .) 1> >(GREP_COLORS=’ms=01;32′ grep .) is used to color the output –> stderr in red, stdout in green).
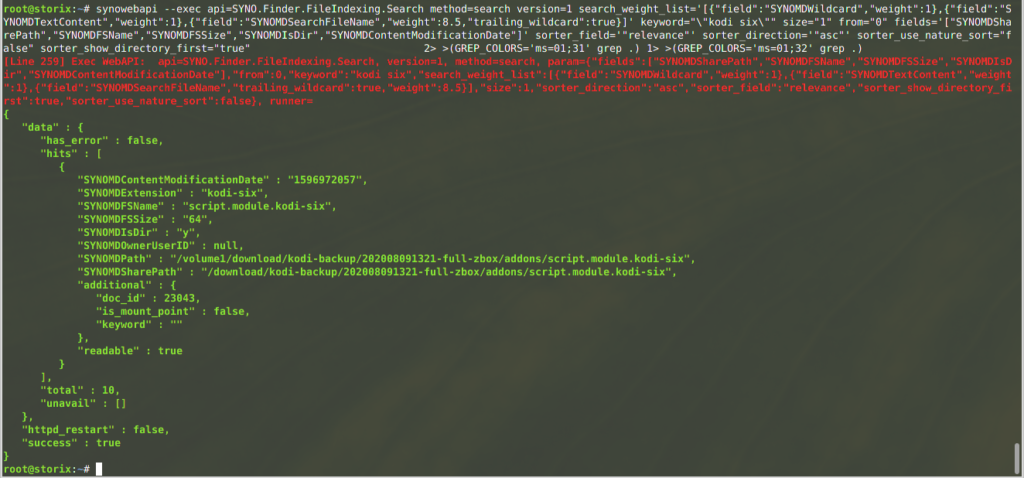
You can combine this with the “jq” command line tool, to parse json data, and get rid of stderr by sending it to /dev/null:

Some more JQ magic, to make it more human readable (the file size now chooses between showing bytes or MB – sorry, no MB examples, but you can try for yourself):

In case you want to play around with these commands, here some copy/paste code:
# search, and put raw json in /tmp/search.json
# The "<strong>*</strong>" in this command is the search term, replace by anything you want,
# but keep the to \" around it to make it a valid json value.
# The size="<strong>300</strong>" indicates the max result records.

synowebapi --exec api=SYNO.Finder.FileIndexing.Search method=search version=1 search_weight_list='[{"field":"SYNOMDWildcard","weight":1},{"field":"SYNOMDTextContent","weight":1},{"field":"SYNOMDSearchFileName","weight":8.5,"trailing_wildcard":true}]' keyword="\"<strong>*</strong>\"" size="<strong>300</strong>" from="0" fields='["SYNOMDSharePath","SYNOMDFSName","SYNOMDFSSize","SYNOMDIsDir","SYNOMDContentModificationDate"]' sorter_field='"relevance"' sorter_direction='"asc"' sorter_use_nature_sort="false" sorter_show_directory_first="true" 2>/dev/null >/tmp/search.json

# process /tmp/search.json, to format nicely

cat /tmp/search.json | jq -r '.data.hits[] | ( (.SYNOMDContentModificationDate|tonumber | strftime("%Y-%m-%d %H:%M")) + (if .SYNOMDIsDir=="y" then " [dir] " else " [file]" end) + " \"" + .SYNOMDPath + "\" (" + (if .SYNOMDFSSize|tonumber >= 1048576 then ((.SYNOMDFSSize|tonumber)/1048576+0.999|floor|tostring) + "MB)" else .SYNOMDFSSize + " Bytes)" end) )'
Code language: PHP (php)
Of course this all needs to be put in a nice shell script, for easy of use. Additional things in that script;
- highlighting the search terms in the output.
- make a tool installer option, to be able to run this as non-root user (the synowebapi command unfortunately only works for the root user, so I had to add some sudo config code).
- add quoting / error handling / temp file cleanup / help text.
- show the total search hits (and limit the list to max 1000).
The final script can be found here: https://github.com/atkaper/synology-universal-search-cli
And installation can be done like this:
# log on as root to a command line shell (login as admin user, and
# type "sudo -i" to get to the root shell).

# download script
wget https://raw.githubusercontent.com/atkaper/synology-universal-search-cli/main/search -O /tmp/search

# optional: look at the script, before executing it as "root" ;-)
cat /tmp/search

# run the script install function
bash /tmp/search --install

# cleanup the downloaded file
rm -rf /tmp/searchCode language: PHP (php)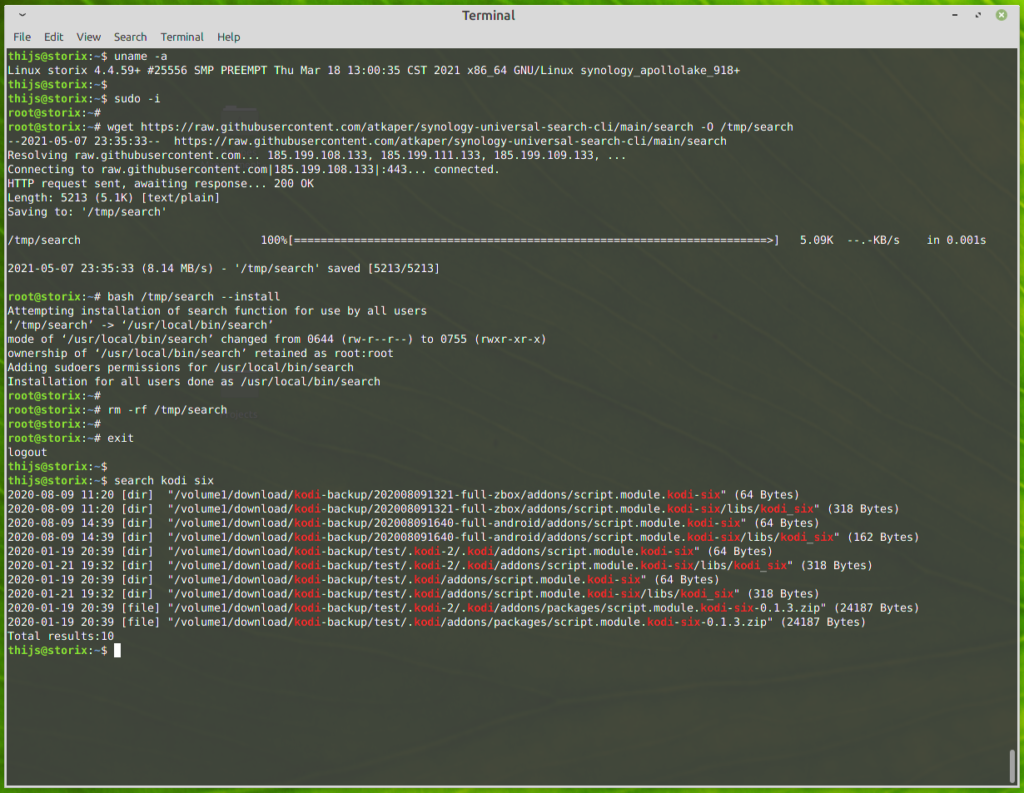
And that’s it. All done! My normal non-root user can now run the search from command line. Nice!
If anyone finds an easier way, using an existing Synology command line tool, or using some clever elastic query, then I’d like to know 😉
Security Disclaimer: I have sort of attempted to make the script as secure as possible. BUT… it does run as root, so there is always the possibility that someone finds a way to get it to execute unwanted sub-commands, which are not part of the script. This would open up root access to them. As I am the only command line user on my NAS, I do not care about this too much, but keep this in mind. If you find an exploit/issue, let me know, and I’ll fix it. I am most worried by the keyword=”\”$*\”” in the script. That’s asking for abuse, but I did not get it to break by injecting single or double quotes and semicolons. An example you can try to test security, is commands like these:
# run script in "debug mode" by using "bash -x"
# and try injecting nasty stuff as search term:
bash -x /usr/local/bin/search "''''\"\"\"; id >/tmp/x"Code language: PHP (php)
Tip: If you are more interested in the “shared” location than the physical location of the files in the result, then replace “.SYNOMDPath” by “.SYNOMDSharePath” in the script in the JQ command. And of course, you can play around with any of the shown attributes, or add more of them by looking at the browser network tab, when using the GUI version.
One last note about running this as root. The installer adds one line to /etc/sudoers:

But as soon as Synology issues a new OS version, or OS update, this line might get removed by them again. If that happens, you will notice that trying a search as non-root will ask for your user password. If that happens, just run “search –install” [that’s a double minus before install] again. No need for new download. The –install will re-add the sudoers line. It does check if the line is there already, so you can run install as many times as wanted, without negative impact.
Thijs Kaper, May 8, 2021.
p.s. I would have been equally happy if the normal “locate” and “sudo updatedb” commands were available. But too bad… (Ok, after publishing this article, I installed locate also 😉 See: https://github.com/atkaper/synology-locate-file-search-cli on how to do that, if your NAS supports running docker).
p.s. One more improvement could be suppressing the byte-size after directory search results. These do not have any useful value. –> DONE

3 thoughts on “Synology Universal Search CLI”
Nice work.
I used locate (via ipkg) for years, I never noticed there was UniversalSearch, but now I try to use its index (it’s still indexing…) for Finder (or perhaps Spotlight) search on a mac.
Thanks, appreciate your work.
Nice detective work. I am trying to expand my Mac file search tool to talk directly to Universal Search and this might help.
A small bug: You need to remove the “” tags from the cmdline example or the cmd will complain about invalid JSON.
Thanks. Perhaps wordpress messed with my quotes 😉 If anyone runs into this, you know what to look for… some wrong quotes to fix (sorry, I did not fix the article, but guess you can manage).